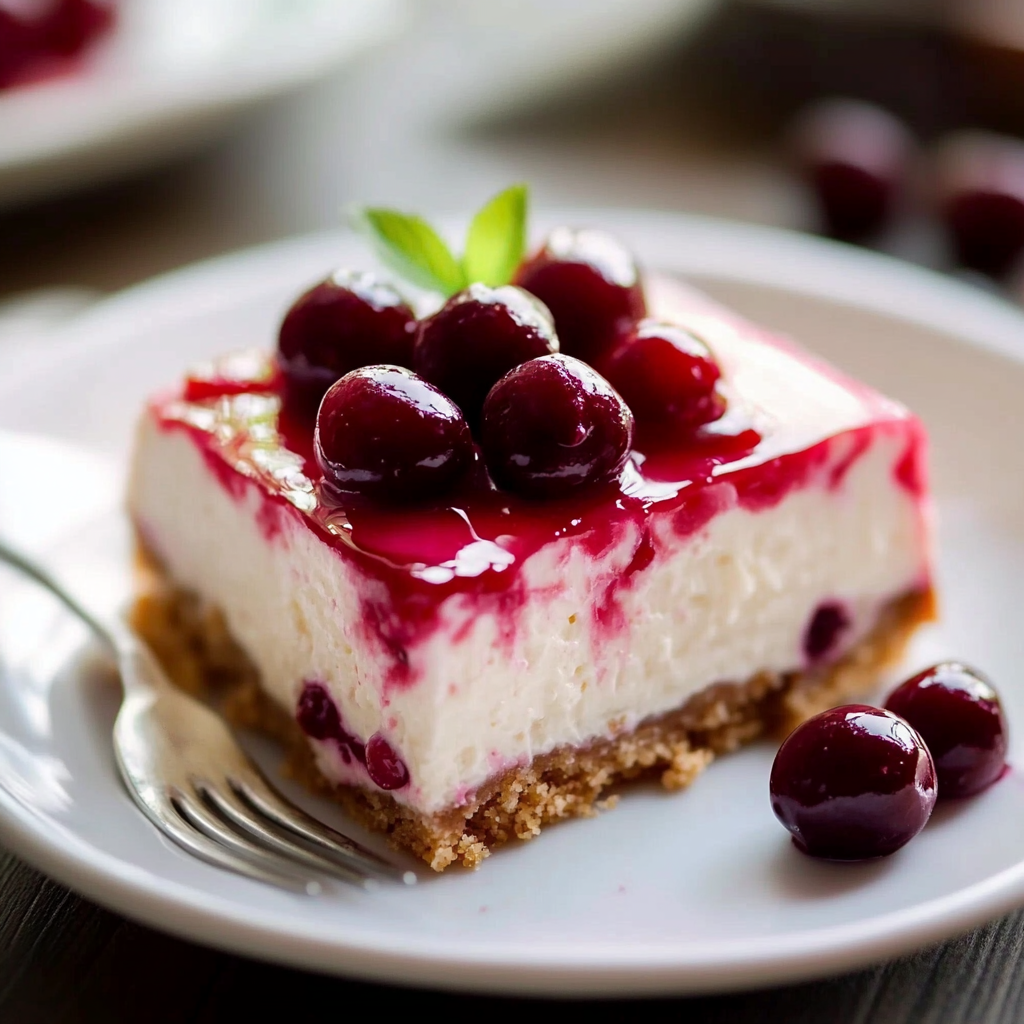
If you’re looking for a dessert that combines creamy goodness with a burst of fruity flavor, look no further than Cherry Cheesecake Lush. This no-bake delight is a crowd-pleaser that brings together layers of rich cream cheese filling, fluffy whipped cream, and tangy cherries. Perfect for parties, holidays, or simply satisfying your sweet tooth, this decadent dessert requires minimal effort while delivering maximum flavor.
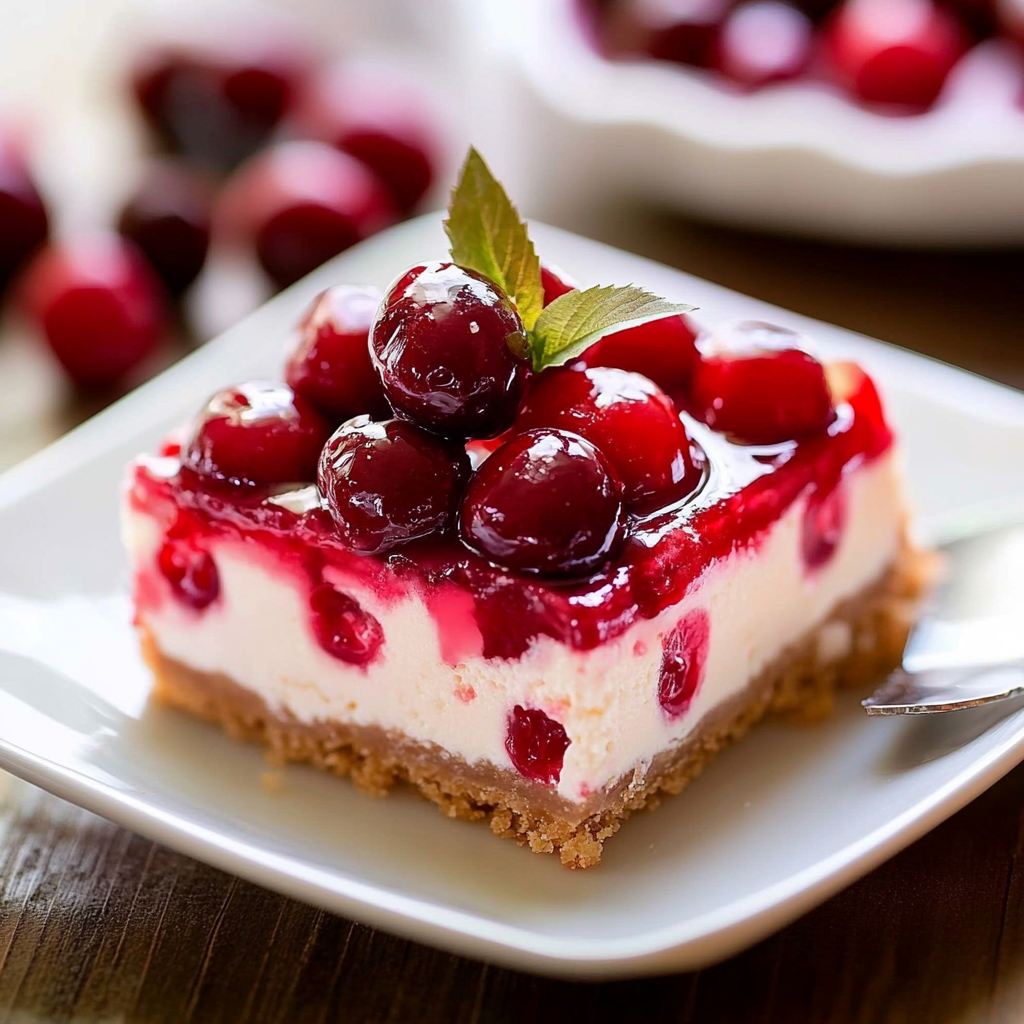
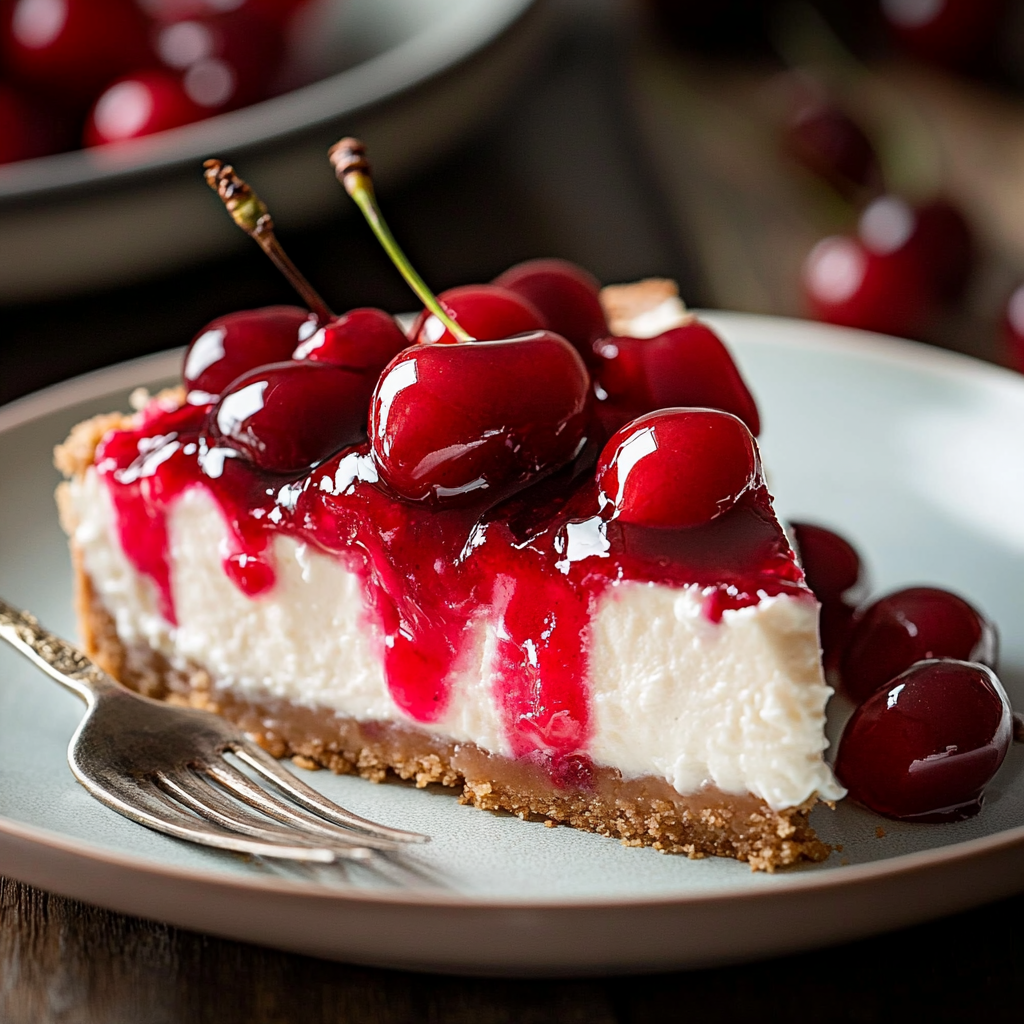
Cherry Cheesecake Lush stands out not only for its delicious taste but also for its beautiful presentation. Each layer is visually appealing and inviting, making it an impressive addition to any table setting. The best part? You can prepare it ahead of time and let it chill in the fridge until you?re ready to serve. With just a few key ingredients and straightforward steps, you?ll have a delightful treat that everyone will rave about.
In this article, we will dive into the essential ingredients needed to create this luscious dessert and provide detailed step-by-step instructions on how to prepare it. Additionally, we will share some serving and storing tips to help you make the most of your Cherry Cheesecake Lush experience. So roll up your sleeves and get ready to impress your friends and family with this irresistible recipe!
Main Ingredients
Cream Cheese
Cream cheese is the star ingredient in any cheesecake recipe. For our Cherry Cheesecake Lush, you’ll need 8 ounces of softened cream cheese. This ingredient adds a rich and creamy texture that forms the base of our filling. The creaminess balances out the sweetness from other components while offering that signature tangy flavor characteristic of cheesecakes. Make sure it’s softened at room temperature for easy blending.
Powdered Sugar
To sweeten the cream cheese mixture without adding graininess, we use 1 cup of powdered sugar. This ingredient dissolves easily into the cream cheese and contributes to achieving a smooth consistency in our filling. The sweetness level can be adjusted according to taste preferences?feel free to add more or less as desired!
Whipped Topping
For lightness and volume in our layers, 8 ounces of whipped topping is essential. This airy component gives our dessert its fluffy texture and helps lighten the rich cream cheese filling. When mixed together with cream cheese and powdered sugar, it creates an indulgent yet light experience on your palate.
Graham Cracker Crumbs
Graham cracker crumbs form the base layer of our Cherry Cheesecake Lush. You’ll need 1 cup of crumbs combined with 4 tablespoons of melted butter for that perfect crumb crust texture. This mixture provides a crunchy contrast to the creamy layers above while imparting a subtle sweetness that enhances the overall flavor profile.
Cherry Pie Filling
No cherry cheesecake would be complete without cherry pie filling! For this recipe, you’ll require 1 can (about 21 ounces) of cherry pie filling. This fruit layer not only adds vibrant color but also infuses each bite with tartness that beautifully complements the richness of the cream cheese layer.

How to Prepare Cherry Cheesecake Lush
Step 1: Prepare the Base Layer
Begin by preparing your graham cracker crust base. In a mixing bowl, combine 1 cup of graham cracker crumbs with 4 tablespoons of melted butter. Stir until all crumbs are evenly coated in butter; it should resemble wet sand without clumping together too much.
Next, take an 8×8-inch or similar sized baking dish and evenly spread this crumb mixture across the bottom using your fingers or a flat object like a measuring cup to press down firmly. Make sure it’s compacted well; this will help hold its shape once set. Place this dish in the refrigerator for about 10 minutes while you prepare the next layer.
Step 2: Make Cream Cheese Mixture
In another mixing bowl, add 8 ounces of softened cream cheese alongside 1 cup powdered sugar. Using an electric mixer on medium speed, beat these two ingredients together until smooth?about two minutes should suffice.
Once blended well without lumps forming, fold in 8 ounces of whipped topping gently using a spatula or wooden spoon until everything is combined thoroughly but remains airy?don’t overmix! After achieving that lovely fluffy consistency, spread this mixture evenly over the graham cracker crust you prepared earlier.
Step 3: Add Cherry Layer
Now it?s time for our delicious cherry layer! Open your can of cherry pie filling (about 21 ounces) and pour it over the cream cheese mixture carefully?try not to disrupt those lovely layers underneath too much! Using a spatula or back of a spoon spread cherries evenly across so every piece gets some fruity goodness when served later.
After layering cherries on top nicely cover with plastic wrap or foil then refrigerate for at least two hours?preferably overnight if time allows?to let all flavors meld together perfectly while firming up slightly before serving!

Serving and Storing Tips
Serving Suggestions
When you’re ready to serve your Cherry Cheesecake Lush dessert after chilling adequately ensure it’s cut into squares using a sharp knife dipped in warm water?it helps create cleaner cuts! Garnish each slice with additional whipped topping or maybe even some fresh cherries if desired; they add extra flair while enhancing visual appeal further!
This luscious treat pairs wonderfully with coffee or tea as well?perfect for afternoon gatherings or evening dinners alike! Consider presenting slices on elegant plates alongside garnishes like mint leaves for added freshness; guests will surely appreciate such thoughtfulness!
Storage Guidelines
To store any leftovers (if there are any!), simply cover tightly with plastic wrap or aluminum foil before placing back into refrigerator where it’ll keep fresh up-to three days maximum! Avoid freezing as texture may change after thawing?this dessert shines when enjoyed fresh!
Be mindful not to leave outside room temperature longer than two hours during warmer months?it could spoil quickly due heat exposure so always err on side caution here! Following these tips allows you enjoy every bite without worry ensuring delightful experience continues long after initial serving concludes!
Love this dish? You?ll enjoy these too!
Mistakes to avoid:
Overmixing the Cream Cheese Mixture
When preparing your Cherry Cheesecake Lush, one common mistake is overmixing the cream cheese mixture. While it may seem like a good idea to whip it until perfectly smooth, overmixing can lead to a runny texture that won’t set properly. Instead of achieving a fluffy consistency, you might end up with a dense filling that lacks the lightness you desire. Mix just until combined, ensuring that no lumps are visible. This will help maintain the creamy texture while allowing the flavors to meld beautifully.
Ignoring Chilling Time
Another critical mistake is not allowing enough time for chilling. The Cherry Cheesecake Lush needs to set in the refrigerator for several hours, preferably overnight. Skipping this step might result in a dessert that doesn’t hold its shape when served. Chilling allows all the layers to meld and firm up properly, enhancing both flavor and presentation. When you’re tempted to dig in right away, remember that patience is key to achieving the best results.
Using Low-Quality Ingredients
Using low-quality ingredients can significantly impact the final outcome of your Cherry Cheesecake Lush. Opting for generic brands or outdated products can compromise taste and texture. For example, fresh cherries make a world of difference compared to canned ones packed in syrup. Always choose high-quality cream cheese and whipped topping for a rich and creamy filling. Investing in quality ingredients ensures that your dessert not only tastes great but also looks appealing.
Expand your recipe collection with this!
Tips and tricks:
Layering Techniques
When assembling your Cherry Cheesecake Lush, pay attention to layering techniques. Start with a solid crust made from crushed graham crackers mixed with melted butter for a buttery base. Evenly distribute cream cheese mixture on top and follow with cherry pie filling or fresh cherries. Use a spatula to spread each layer smoothly, ensuring even distribution throughout the dish. This method enhances both visual appeal and flavor balance, making each bite a delightful experience.
Customizing Flavor Profiles
Don?t hesitate to customize your Cherry Cheesecake Lush by adding different flavor profiles! You can incorporate almond extract into the cream cheese mixture for an extra depth of flavor or experiment with chocolate layers beneath the cheesecake filling. Another great addition is lemon zest for brightness, which complements the sweetness of cherries beautifully. By personalizing your recipe, you?ll create a unique version that suits your taste preferences while still honoring the classic essence of this beloved dessert.
Presentation Matters
An often-overlooked aspect when making Cherry Cheesecake Lush is presentation. While taste is crucial, visually appealing desserts create excitement at gatherings or special occasions. Consider using individual serving cups or glasses instead of one large dish for an elegant touch. Top each serving with fresh cherries and whipped cream just before serving to ensure they look fresh and inviting. A sprinkle of graham cracker crumbs on top adds texture and color, making your creation not only delicious but also stunning.
More culinary magic awaits you here!
Suggestions for Cherry Cheesecake Lush:
Pairing with Beverages
To elevate your Cherry Cheesecake Lush experience, consider pairing it with complementary beverages. A sweet dessert wine or sparkling ros? enhances the flavors without overwhelming them. Alternatively, if you prefer non-alcoholic options, serve with iced tea infused with fruit or lemonade for refreshing contrasts against the richness of the cheesecake lush. Thoughtful beverage pairings can enhance overall enjoyment and make your dessert spread feel more complete.
Serving Temperature
The ideal serving temperature for your Cherry Cheesecake Lush can greatly affect its texture and taste profile. Aim to serve it chilled but not too cold; straight from the fridge may mask some flavors while making it difficult to scoop out clean portions. Letting it sit at room temperature for about 15 minutes before serving allows flavors to bloom while maintaining its structural integrity. This small adjustment leads to an improved tasting experience for everyone at your table.
Leftover Storage Tips
If you happen to have leftovers after enjoying your Cherry Cheesecake Lush, proper storage is essential for maintaining freshness. Cover any remaining portions tightly with plastic wrap or transfer them into an airtight container before placing them back into the refrigerator. Consume within three days for optimal taste?beyond this timeframe; textures may deteriorate due to moisture absorption or separation of layers. Following these simple storage tips ensures that every bite remains delicious long after initial preparation!
Unleash more flavor with these recipes!
FAQs for Cherry Cheesecake Lush :
What are the main ingredients in Cherry Cheesecake Lush?
Cherry Cheesecake Lush is a delightful dessert that combines layers of creamy cheesecake filling, whipped topping, and cherry pie filling. The key ingredients typically include cream cheese, powdered sugar, cool whip or whipped cream, graham cracker crumbs, and cherry pie filling. Some variations might involve adding sour cream for tanginess or using fresh cherries instead of pie filling. The crust often consists of crushed graham crackers mixed with melted butter, creating a buttery base that complements the rich cheesecake flavors. Additionally, you may find some recipes calling for vanilla extract to enhance the overall taste. This dessert is easy to prepare and is perfect for gatherings or special occasions.
Can I use fresh cherries instead of cherry pie filling in this recipe?
Yes, you can absolutely use fresh cherries instead of cherry pie filling when making Cherry Cheesecake Lush. Using fresh cherries adds a bright flavor and a vibrant color to your dessert. To prepare them, simply wash and pit the cherries before slicing them in half or roughly chopping them. You can also toss the fresh cherries with a little sugar to macerate them briefly; this will help release their juices and create a more syrupy texture similar to that of cherry pie filling. Keep in mind that using fresh cherries might alter the consistency slightly compared to using canned filling, but it will give your dessert a delightful freshness.
How long does Cherry Cheesecake Lush need to chill before serving?
Cherry Cheesecake Lush needs ample time to chill before serving to allow its flavors to meld together properly. Ideally, you should let it chill in the refrigerator for at least 4 hours. This chilling period helps set the layers and gives the cheesecake mixture time to firm up, making it easier to slice and serve. For best results, consider refrigerating it overnight if you have time; this extra time enhances the flavors even further and ensures a perfectly creamy texture. Remember that these desserts taste great when served cold, so give it that necessary chilling time for an optimal experience.
Can I make Cherry Cheesecake Lush ahead of time?
Absolutely! One of the best features of Cherry Cheesecake Lush is its make-ahead convenience. You can prepare this dessert one or even two days in advance without compromising its quality or taste. Just be sure to cover it tightly with plastic wrap or aluminum foil once assembled, storing it in the refrigerator until you’re ready to serve. Doing so allows the flavors to develop beautifully while keeping the dessert fresh. When you’re ready to present it, top with additional whipped cream or freshly sliced cherries for an eye-catching finish.
Is Cherry Cheesecake Lush suitable for gluten-free diets?
Yes! You can easily make Cherry Cheesecake Lush gluten-free by substituting regular graham cracker crumbs with gluten-free alternatives made from nuts or other gluten-free grains. Many brands offer gluten-free graham crackers that work perfectly as a base for this dessert. Additionally, ensure that all other ingredients used?such as cream cheese and whipped topping?are gluten-free as well. By making these adjustments, you can enjoy this delicious treat while accommodating those with gluten sensitivities without sacrificing flavor.
Can I freeze leftover Cherry Cheesecake Lush?
While it’s possible to freeze leftover Cherry Cheesecake Lush, keep in mind that freezing may affect its texture once thawed. The creamy layers might become slightly grainy after being frozen and then thawed due to the moisture content in whipped toppings and cream cheese mixtures. If you choose to freeze it, cut individual portions into airtight containers and store them in the freezer for up to three months. When you’re ready to enjoy them again, simply thaw overnight in the refrigerator before serving.
Here?s another recipe you?ll love!
Conclusion for Cherry Cheesecake Lush :
In conclusion, Cherry Cheesecake Lush is an indulgent dessert that brings together rich flavors and delightful textures in every bite. With its creamy cheesecake layer complemented by sweet cherry toppings, this dish makes for an irresistible treat at any gathering or celebration. By using simple ingredients like cream cheese, whipped topping, and either cherry pie filling or fresh cherries, you can create a deliciously layered dessert that’s easy to assemble ahead of time.
Remember that chilling is essential for allowing flavors to meld perfectly; ideally letting it rest overnight will provide an even better experience when served cold. Additionally, consider making substitutions like gluten-free options or incorporating fresh fruits according to your preferences?this versatility makes it accessible for many dietary needs.
Whether you’re preparing this treat for family gatherings or simply craving something sweet at home, you’ll find that Cherry Cheesecake Lush is sure to impress everyone who tries it!
Print
Cherry Cheesecake Lush
- Total Time: 20 minutes
- Yield: Serves 9
Description
Indulge in the delightful layers of Cherry Cheesecake Lush, a no-bake dessert that combines creamy cheesecake flavors with sweet cherry topping. This simple yet impressive treat features a buttery graham cracker crust, velvety cream cheese filling, and luscious cherry pie filling. Perfect for parties or casual gatherings, this dessert is not only easy to prepare but also a feast for the eyes. With minimal effort and maximum flavor, you?ll have everyone asking for seconds!
Ingredients
8 ounces cream cheese (softened)
1 cup powdered sugar
8 ounces whipped topping
1 cup graham cracker crumbs
4 tablespoons melted butter
21 ounces cherry pie filling
Instructions
Prepare the crust by mixing graham cracker crumbs with melted butter. Press into an 8×8 dish and refrigerate for 10 minutes.
In a bowl, blend softened cream cheese and powdered sugar until smooth. Fold in whipped topping gently.
Spread the cream cheese mixture over the crust evenly.
Pour cherry pie filling on top, spreading it gently to avoid disrupting layers.
Cover and refrigerate for at least 4 hours or overnight before serving.
Notes
For a gluten-free option, substitute regular graham crackers with gluten-free ones.
– Fresh cherries can be used instead of pie filling for a lighter flavor.
- Prep Time: 20 minutes
- Cook Time: 0 minutes
Nutrition
- Calories: 320
- Sugar: 20g
- Fat: 18g
- Saturated Fat: 10g
- Carbohydrates: 36g
- Protein: 3g